How to connect with Google Things to do
This article explains what Google Things to do is, how you can get your Bókun inventory connected with Google Things to do and take advantage of this free exposure on Google.
What is Google Things to do?
Google Things to do is a new search experience that enables users to book experiences and activities directly on a supplier’s website and other booking channels while searching for a point of interest or an attraction on Google. Google Things to do was previously only available for tickets and attractions but it has been recently expanded to tours and activities.
Please note that Google Things to do will display selected business listings across mobile devices only. Google is still working on the launch for desktops.
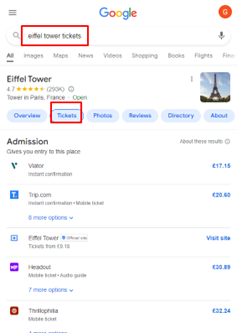
Let’s try to explain this with an example. Marco would love to visit the Eiffel Tower, so he enters the keyword “Eiffel Tower” in the Google search bar. Here, Marco will be able to click on the ‘Tickets’ section that will display a list of ticket options. Each option is linked directly to the product supplier’s checkout page.
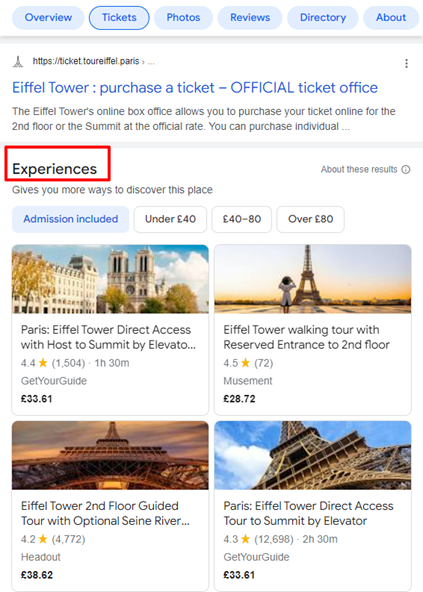
If Marco continues to scroll down to the Experiences section, he will be presented with a variety of experience listings around the point of interest. As with the tickets, each listing is linked directly to the experience supplier’s checkout page, so if Marco clicks on one of those listings, he will be directed to the operator’s booking page.
How can I start selling on Google?
Bókun has partnered with Google to get Bókun paid subscribers to stand out on Google search results and drive bookings to their own website with a placement on Google Things to do. If you aren't on one of our paid plans yet... upgrade to Bókun Start, Plus or PRemium to take advantage of this free exposure on Google.
If you are on Start, Plus or Premium read on!
Get connected with Google Things To Do in 4 simple steps
Navigate to Sales Tools > Google Things to do and click on the title of the product you want to promote on Google Things to do:
Step 1 - Enable Google TTD toggle
Switch the toggle to enable Bókun to send product data to Google.
Step 2 - Choose your website URL
The Website URL is where you want Google to send customers when they click to book your tours.
You can choose to redirect the traveller to a:
- Bókun Website
- Bókun Product Page Widget
- Custom link (a unique bookable page URL for the product)

Step 3 - Select booking channel
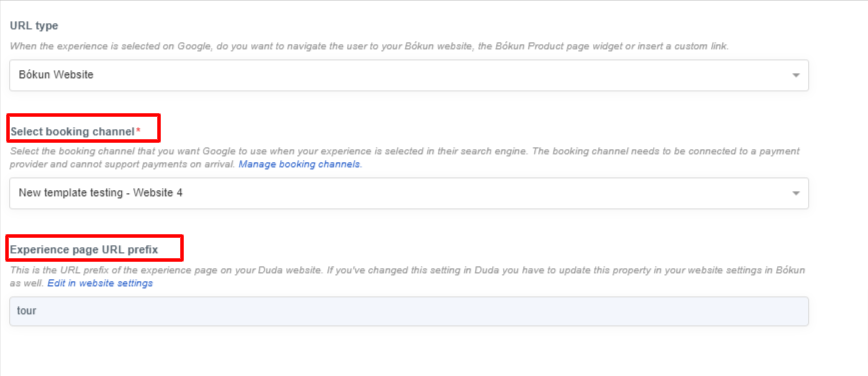
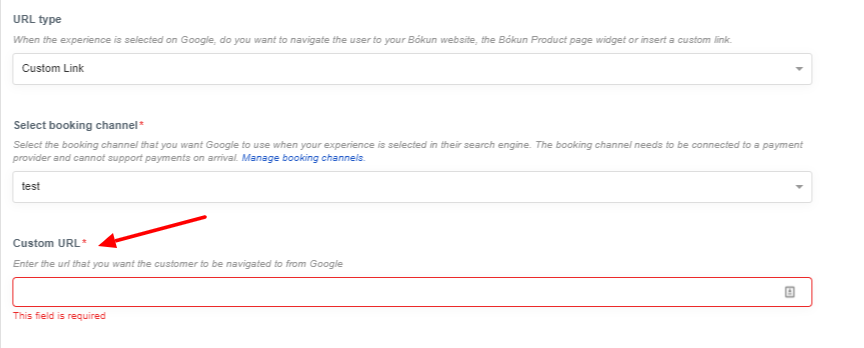
Select the booking channel you want Google to use when the product is selected in Google search engine. Please note that the booking channel needs to be connected to a payment provider and cannot support payments on arrival:

In addition to the booking channel, if you choose to redirect the traveller to:
- your Bókun Website, you will need to specify the experience page URL prefix (this should match the URL of the Tour/Experience page in the Bókun website editor):

- a custom link, you will need to specify the unique product page URL:

Please note that if you choose to redirect the traveller to the Bókun Product Page Widget, your logo will be used as favicon associated with the widget page.
If you haven’t uploaded your logo in Bókun yet, navigate to your username, select Company profile and upload your logo.
Step 4 - Confirm that your product complies with Google product's requirements
Google has certain requirements for products, and you will have to make sure the products are in compliance with Google's product eligibility requirements, otherwise they might not be displayed in Google Things to do or they might incur ranking penalties.
For more information on how to comply with Google product's requirement, read our article: Google Things to do: is your product eligible?
⚠️ Please note that Bókun does not assume responsibility for penalties or non-compliance of the products.
Configuring products in bulk
To configure your products in bulk:
- Got to Sales Tools > Google Things to do section
- Select the products from the list by ticking the box next to the product’s title
- Click on Actions > Edit Experiences on the right-hand side of the page
- Adjust the settings as seen in the previous section

