How to embed a widget to Joomla! CMS
The process of embedding any widget to Joomla! is the same. It doesn't matter whether it is a Calendar, Product Page or Product List, the process is the same.
How do I add a widget to my Weebly site?
- Select Sales tools > Bookings widgets in the left-hand side menu
- Select the booking channel you'd like to add a widget to from the drop-down. A booking channel is an online sales channel that tracks where your online bookings are coming from. Usually, it will be your company's website. Learn more about booking channels.
- Select the widget type in the widget wizard on the left-hand side
- Select the product or product list you'd like to create a widget for
- Click on Generate embed code
- Click the Copy embed code button. This is the code you should use when embedding it into your website.
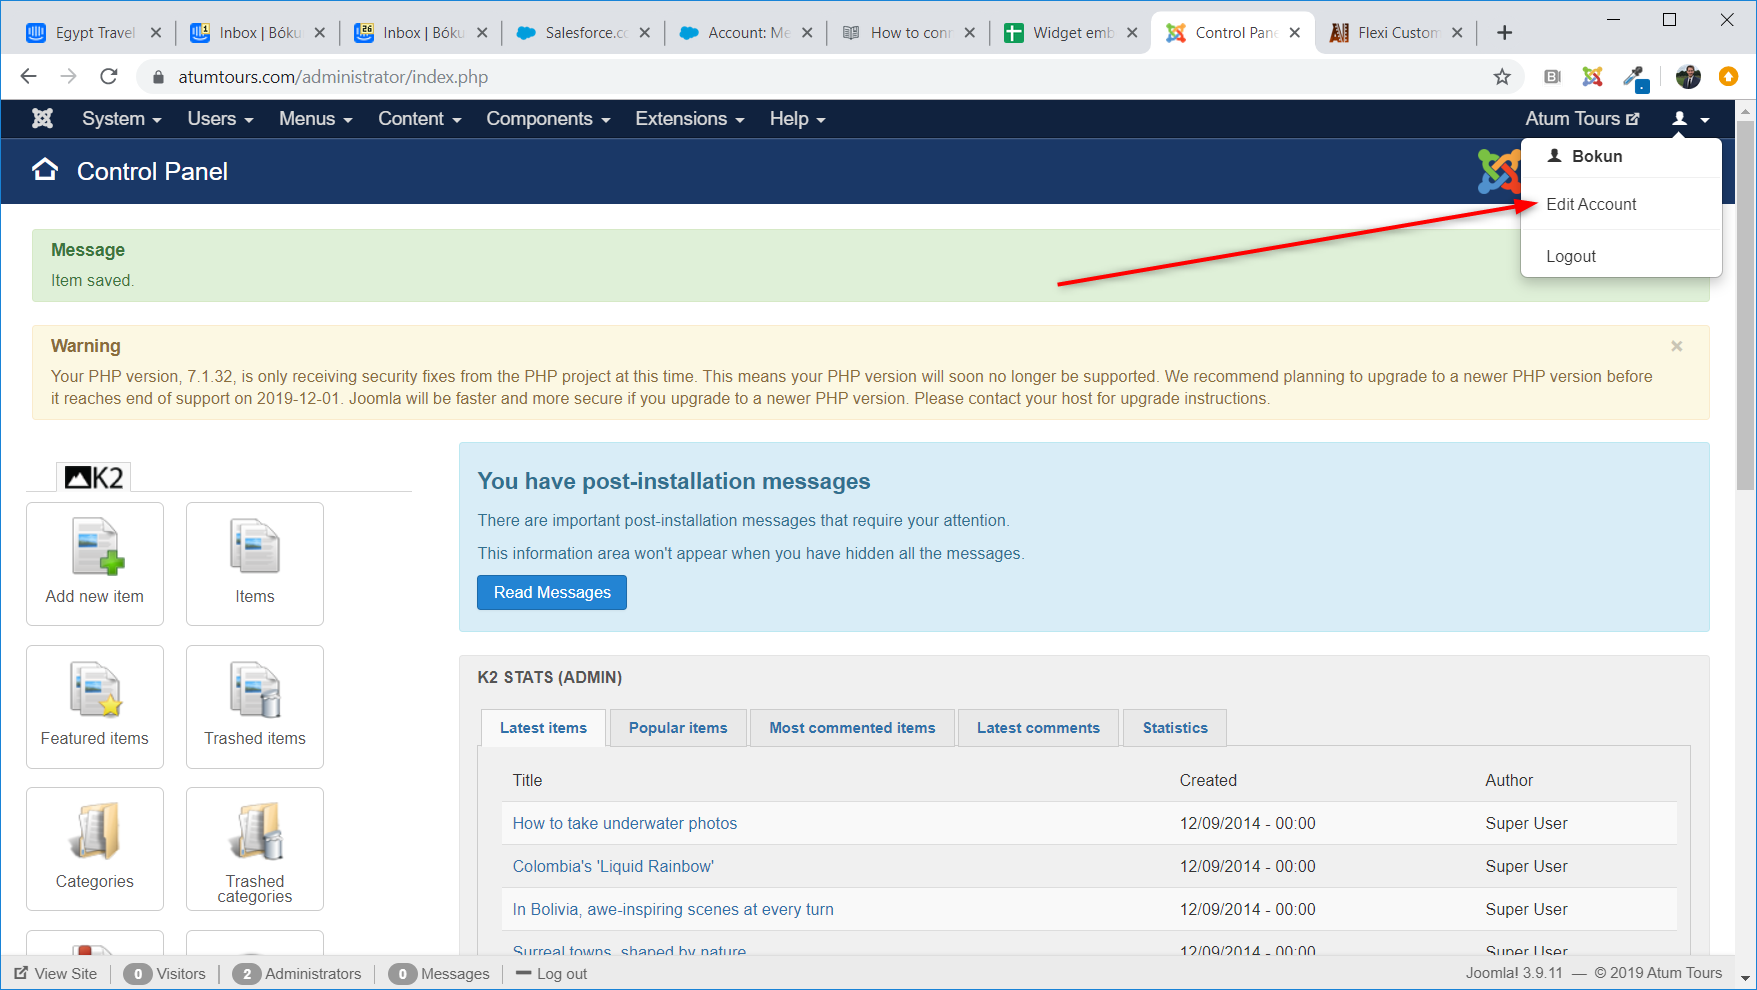
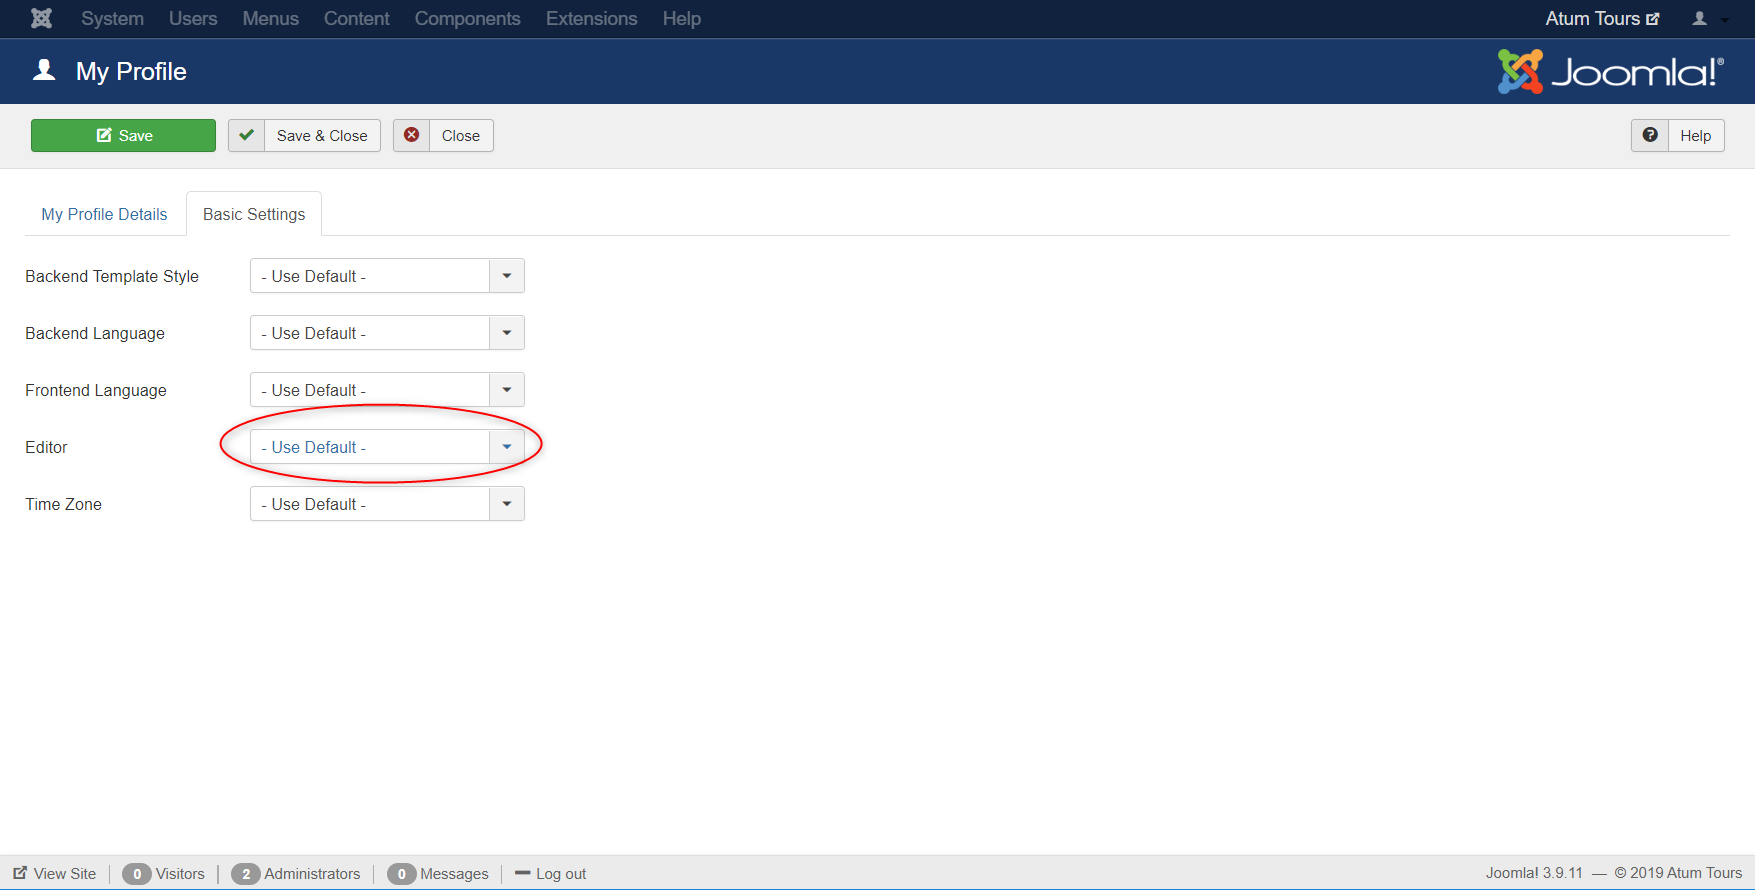
- Log into your Joomla! account. Make sure that before you create the module you switch your default editor to: None. This can be done by going to Account and switching to Editor - None"_in the basic settings. You may need Super User access to change this setting. If you do not have Super User access, reach out to whomever is a Super User in the account and request that they change the editor to _Editor - None.
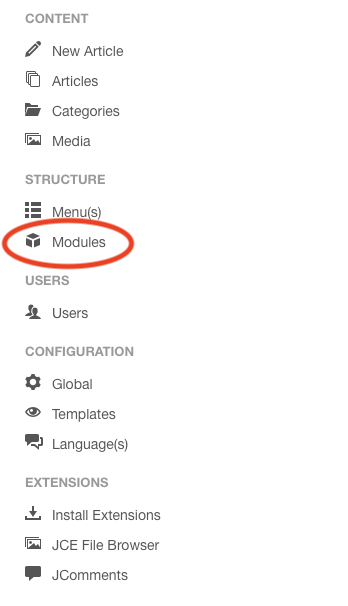
- On the left of the start page you see a drop-down list named Content, there you click Modules.
Once the module is created you can switch the editor back to your original editor.(You may need Super User access in order to change the editor)
- In the modules menu you can edit all widgets that have been created for your site To create a new widget, click +New in the top bar.
![]()
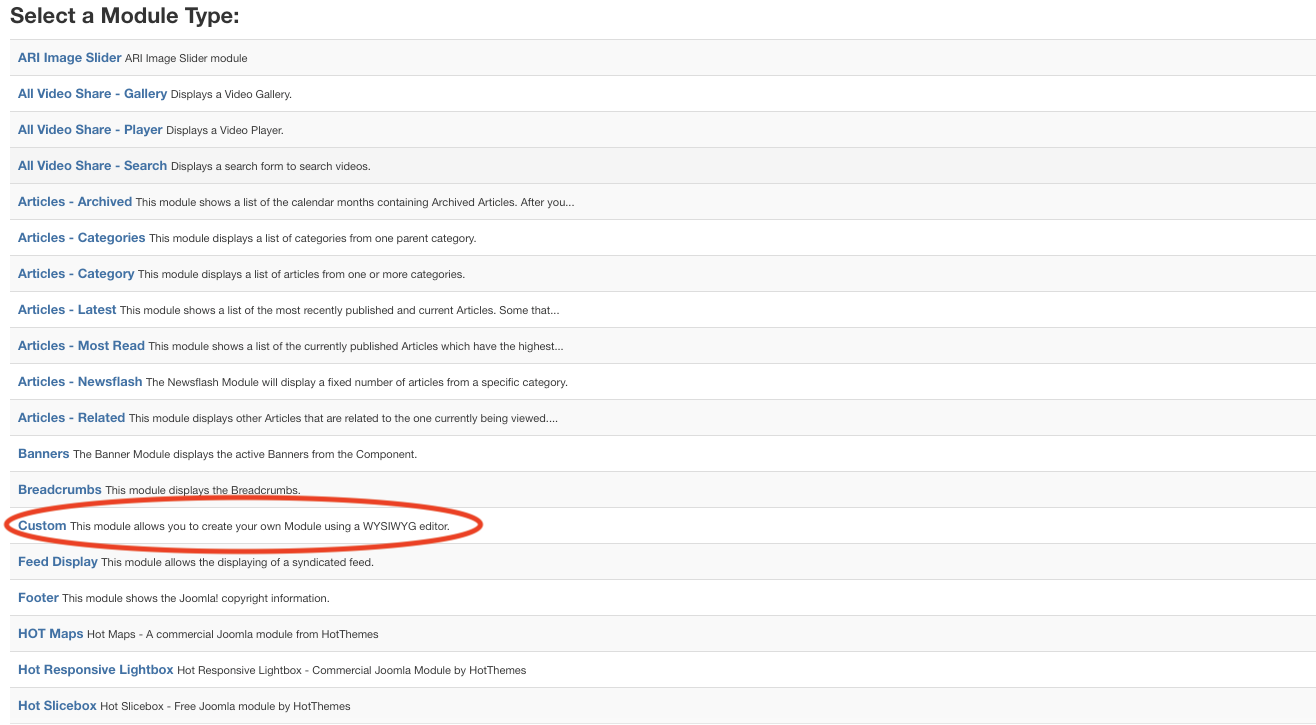
- When creating a new Widget the system will allow you to"Select a Module Type, giving you a variety of templates created for specific type of widgets but what you want to choose is Custom.
- Paste the embed code from your Bókun account in the text box. It's a good rule to create a Title for the widget you are creating, making it easier to come back to it if you want to change it. In this case I put the title "Time Selector Widget - Tour XY".
Next is to decide if you want the Title of the widget to be visible on your website, where you want the widget to appear on the webpage, if you want to start or finish publishing the widget at a specific time and such.
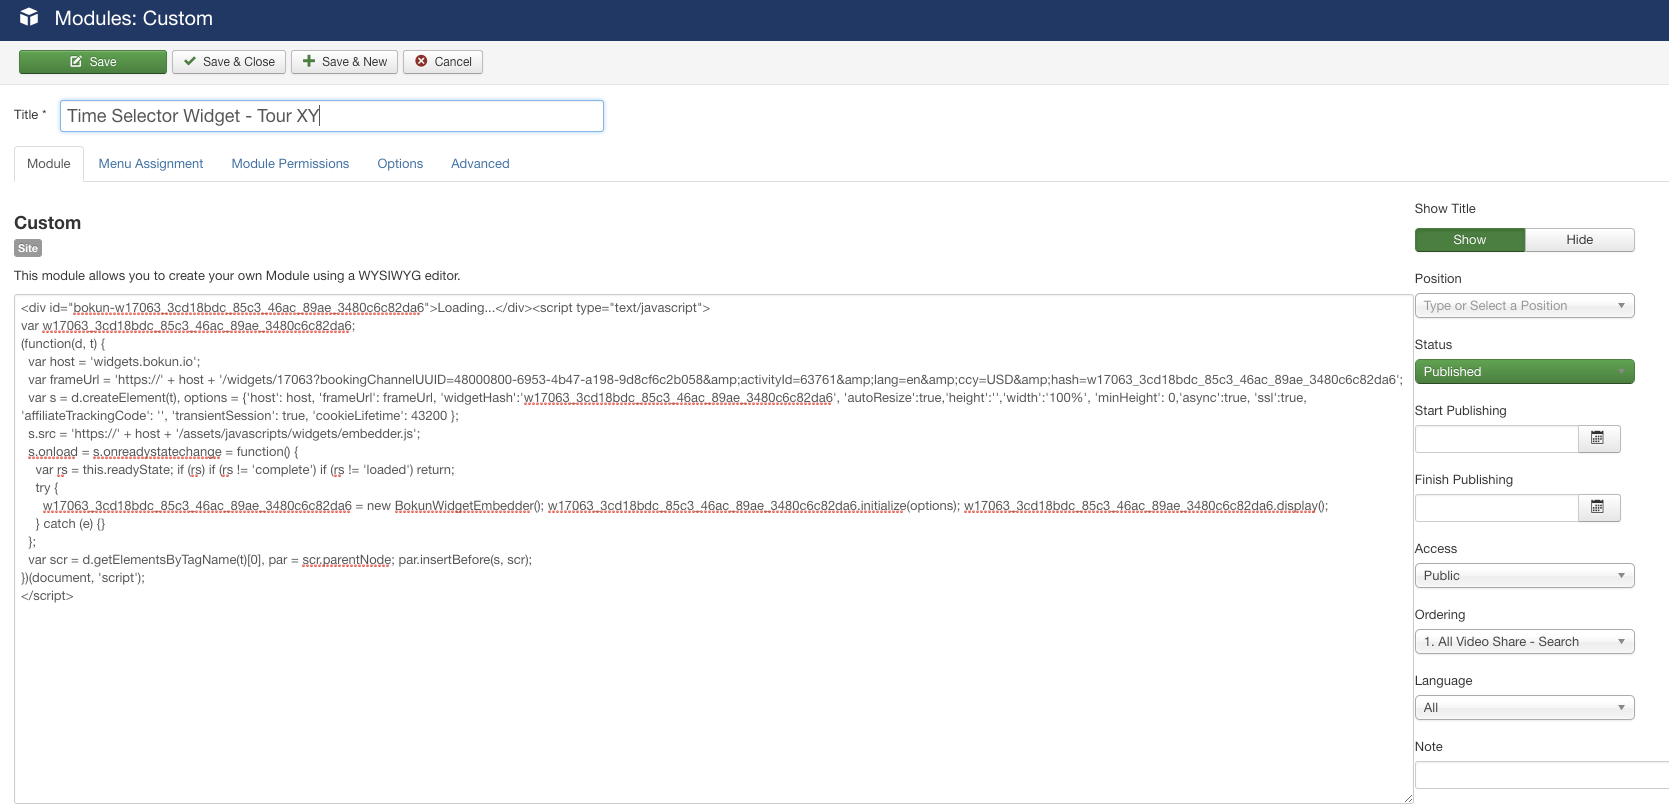
- Click the tab Menu Assignment, there you decide where on your website you want the widget to appear.
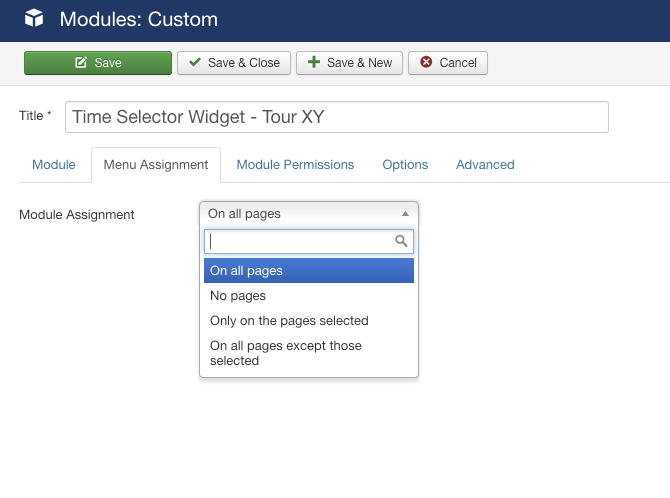
You can have the Widget appearing on every webpage, no pages, only on the pages selected or on all pages except those selected.
If the latter two options are selected a list will show with all the menu items on. This allows you to assign widgets to some but not all pages, and by selecting the menu links that you want the widget associated with you can customize on what pages modules appear/don't appear.
- After you have decided where the widget should appear on your website you should press Save up in the toolbar and continue editing or if you believed you have finished you can press Save & Close.
Now you have gone over the most important steps and should have the widget appearing on your site.