How to embed a widget to Shopify
Adding your widgets to a shopify page is easy.
The process depends on what kind of widget you want to embed so make sure that you get yourself familiar with how to generate different kinds of embed codes.
Here are some links to help you get started:
- How to create a Booking Button Booking Widget
- How to create a Calendar Booking Widget
- How to create a Product Page Booking Widget
- How to create a Product List Booking Widget
Time to embed to Shopify
Now that you have your widget code, its time you add it to your shopify page.
To begin with you will need admin access to your account to make these changes.
We recommend that you add your widgets to a page rather than a blog post.
While you can always embed them to a blog post, a page is more of a permanent solution since they will always stay in the same place.
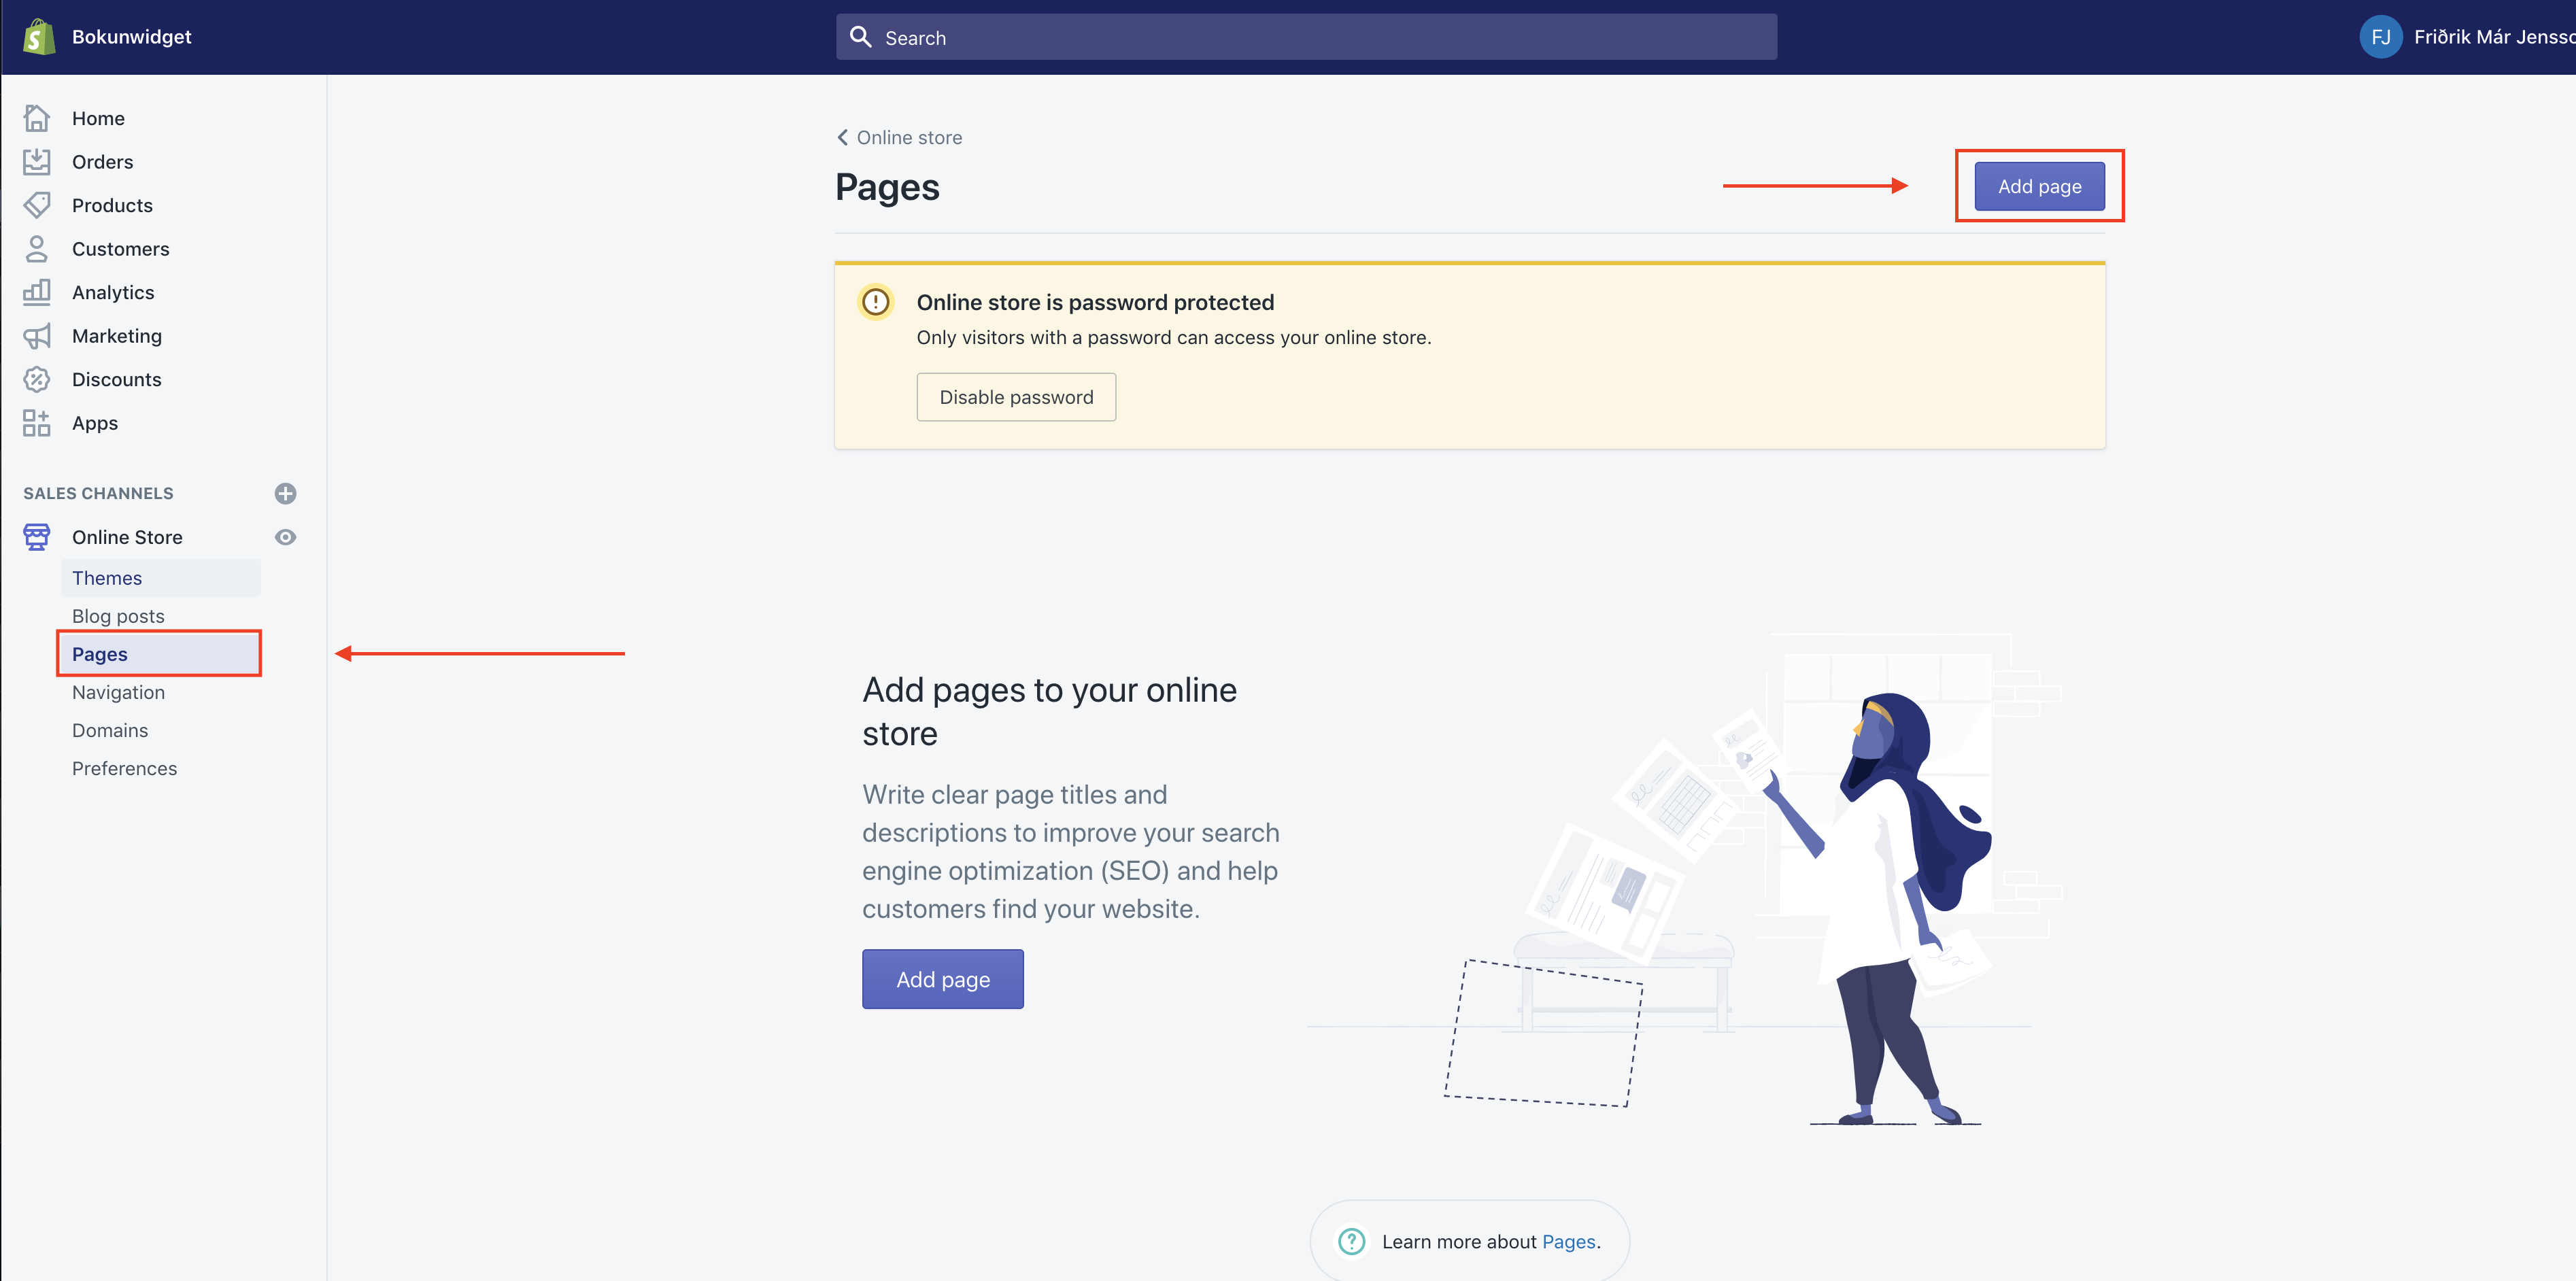
When logged into Shopify navigate toPages under Online Store:

If you don't have a page that you want to use already then you need to add one by clicking "Add page"
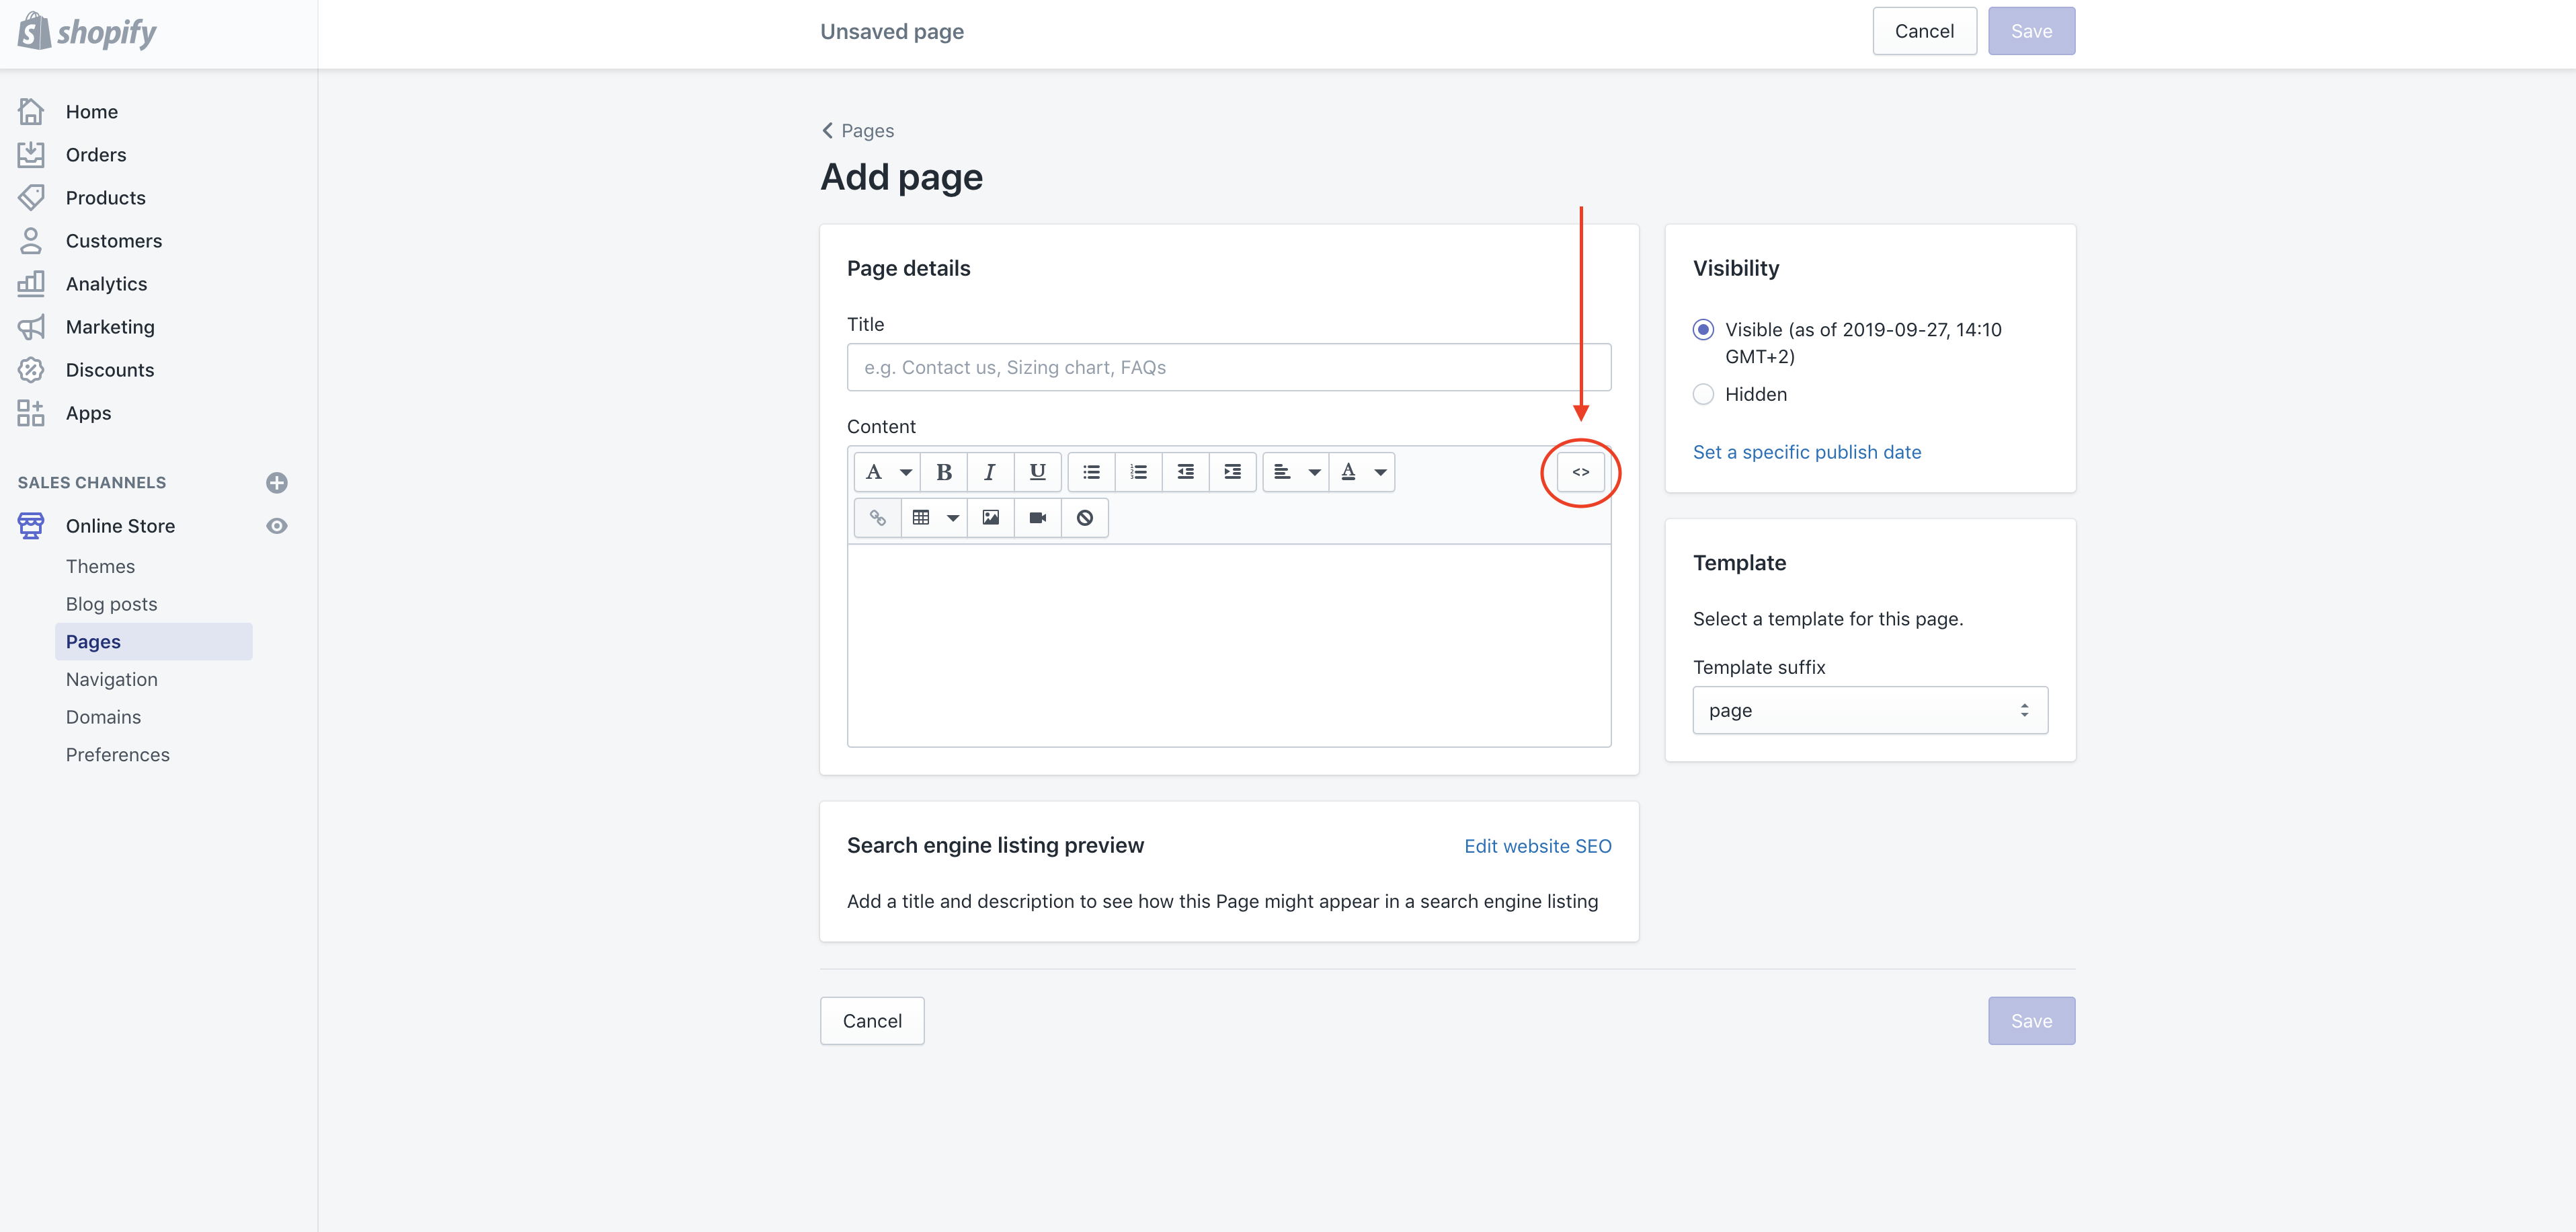
This where we are going to enter our code. Just make sure, before you do anything else, that you click this button(< >):

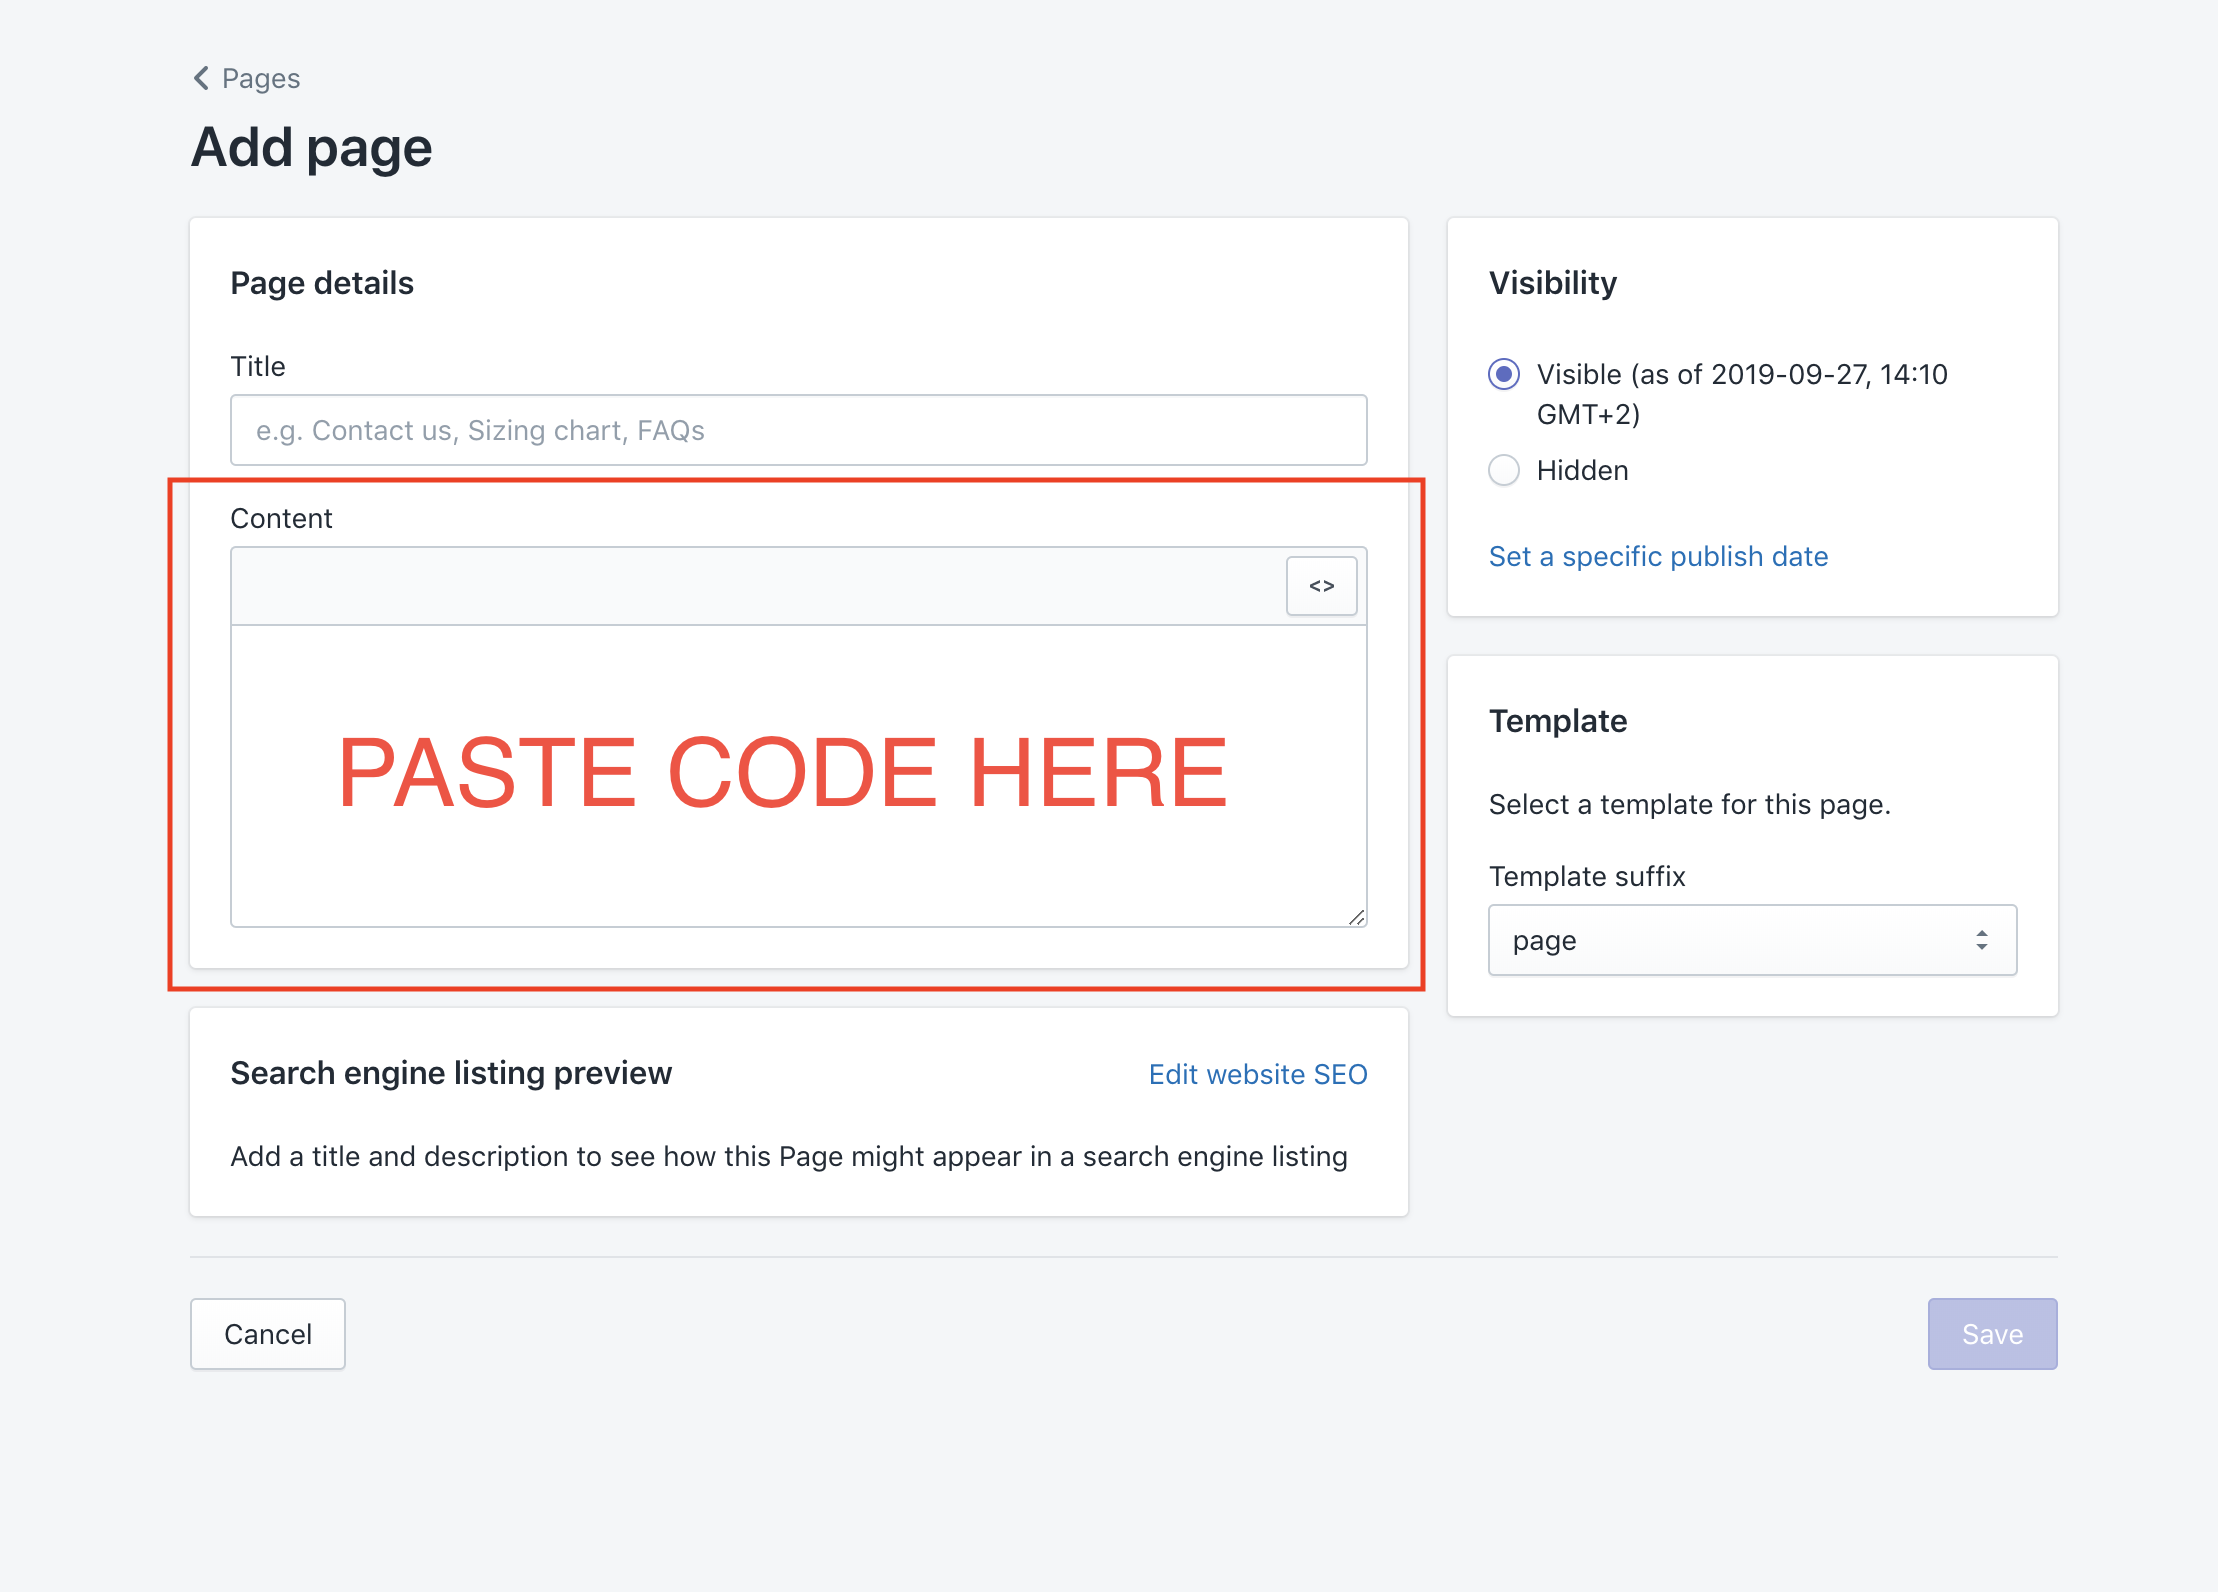
You should see the see the formatting options disappear. Now you can paste your code into the text box:

If everything else is ready (page name and/or other content on page) You can click save.
And your done! You can click "View page" to take a look at your brand new widget:

If you run into any issues, don't hesitate to open up a support chat, we are always happy to help :)