Validating Google Tag Manager and Google Analytics 4 Setup
This article walks you through how to use our Validator tool to ensure that your Google Tag Manager (GTM) setup with Google Analytics 4 (GA4) is properly configured to track e-commerce events.
Why use the Validator Tool?
Bókun strongly encourages you to use the Validator tool when using our new analytics functionality for the following reasons:
- Ensures Accurate Data Flow: When both GTM and GA4 are enabled, GTM takes over sending e-commerce events (like purchases) to GA4. If GTM is misconfigured, these events will not be sent, impacting your tracking accuracy.
- Critical for New Functionality: As part of our upcoming updated tracking integration, using the Validator tool is essential to verify that your GTM setup is properly synced with GA4. This ensures that everything works seamlessly when the new features are activated.
- Improves Tracking Stability: The goal is to improve the reliability and accuracy of your tracking, which in turn will provide better insights for your Google Ads campaigns and overall performance.
By validating your setup now, you can avoid potential issues and ensure that your e-commerce events are reliably tracked for more precise performance analysis.
How to access the Validator tool
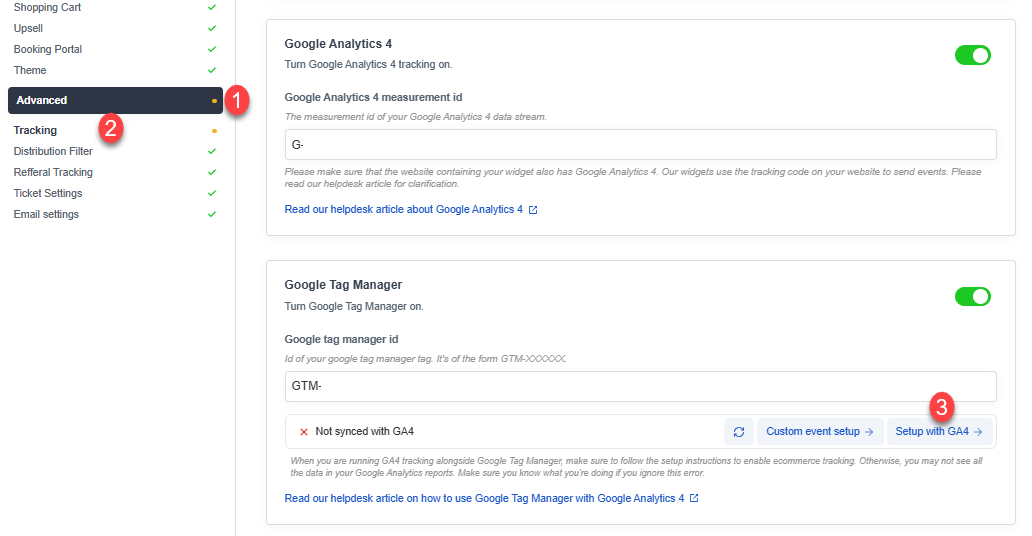
If your GA4 measurement ID and GTM ID are properly configured to the booking channel you want to track events for, and the GTM status is Synced with GA4, great! This means your booking channel is configured correctly for tracking!
If the status is Not synced with GA4, click the Setup with GA4 button (3) and follow the How to use the Validator tool steps.
How to use the Validator tool
Step 1
Visit tagmanager.google.com and sign in with your Google account to access the Tag Manager dashboard.
Step 2
Download the container blueprint file, which contains all the pre-configured GA4 tracking settings needed for your account.

Step 3
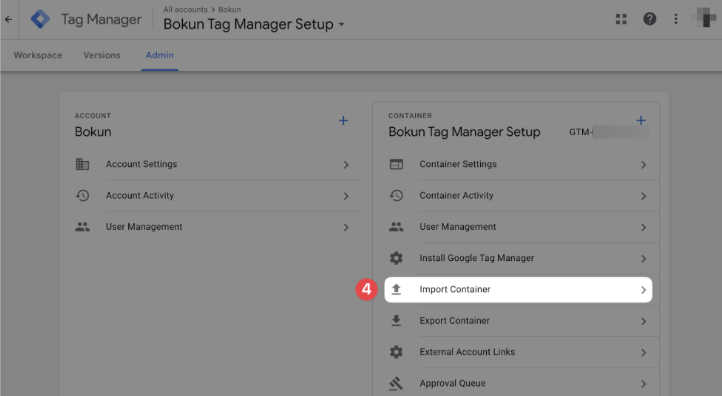
In your GTM workspace, click the Admin tab located in the top navigation bar to access container settings.

Step 4
Look for and click the Import Container option in the Container column to begin importing your configuration.
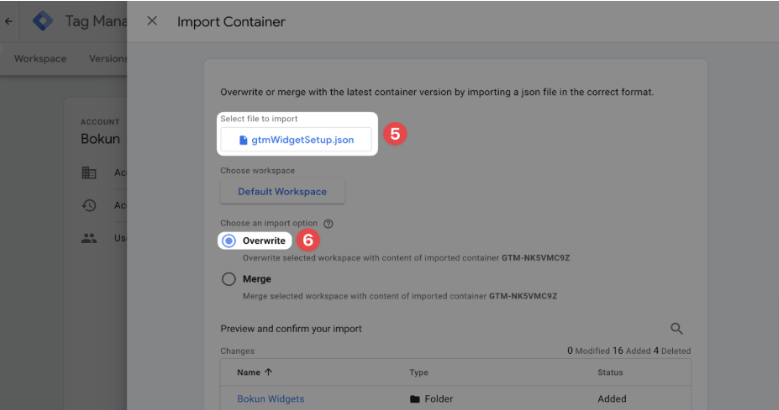
Step 5
Select the gtmWidgetSetup.json file you just downloaded from your computer to import the configuration.
Step 6
Choose the Overwrite option in the import settings to ensure all GA4 tracking configurations are correctly applied to your container.
Step 7
After reviewing the import settings, scroll to the bottom of the page and click Add to workspace to import all tracking configurations.

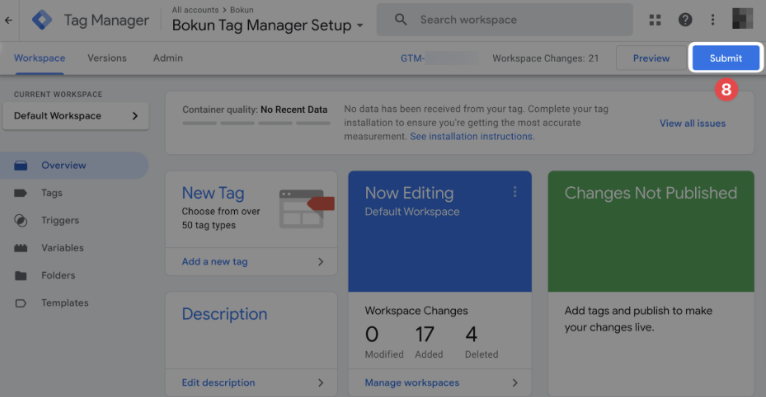
Step 8
Click the Submit button in the workspace to prepare your imported changes for publishing to the live container.
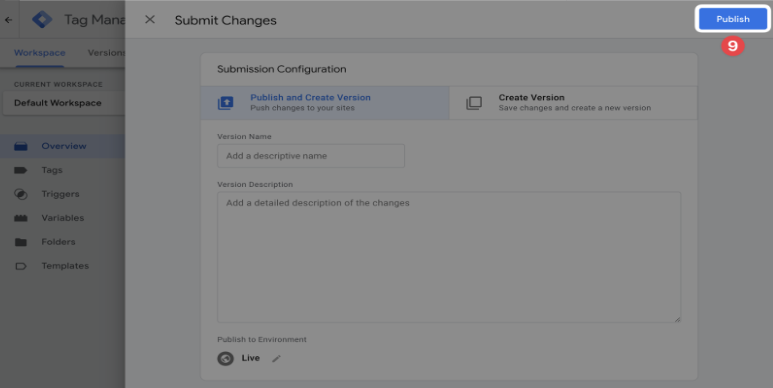
Step 9
Click the Publish button to begin the final process of making your GA4 tracking configurations live on your website.
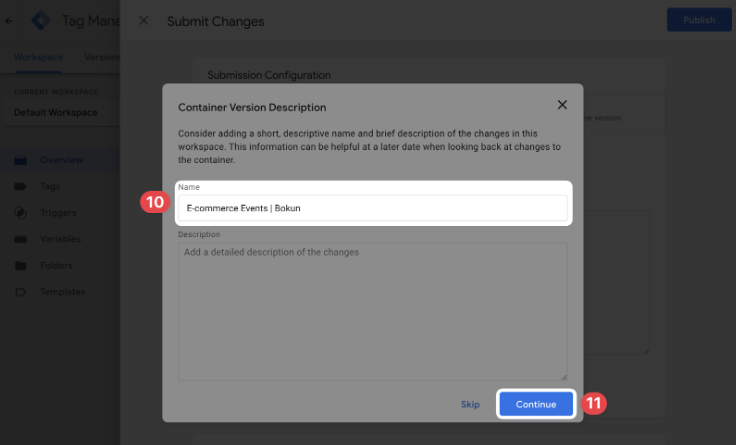
Step 10
Enter a descriptive name for this version, such as E-commerce Events | Bokun, to help track changes in your container's version history.
Step 11
Click the Continue button to complete the publishing process and activate your GA4 tracking configuration.
Step 12
Click Validate to ensure that the setup is correct. Success, you're set up is correct!
