How to add a route to your experiences
This article teaches you how to add a route to your experience.
These are the steps to add a route to your experiences. The route can be seen in Bókun's API, allowing resellers to give their customers even more details about your product.
To create a Route for your product
To create a Route for your product, do the following:
- Navigate to "Products" > "Experiences".
- Click the name of the product you want to add a route to.
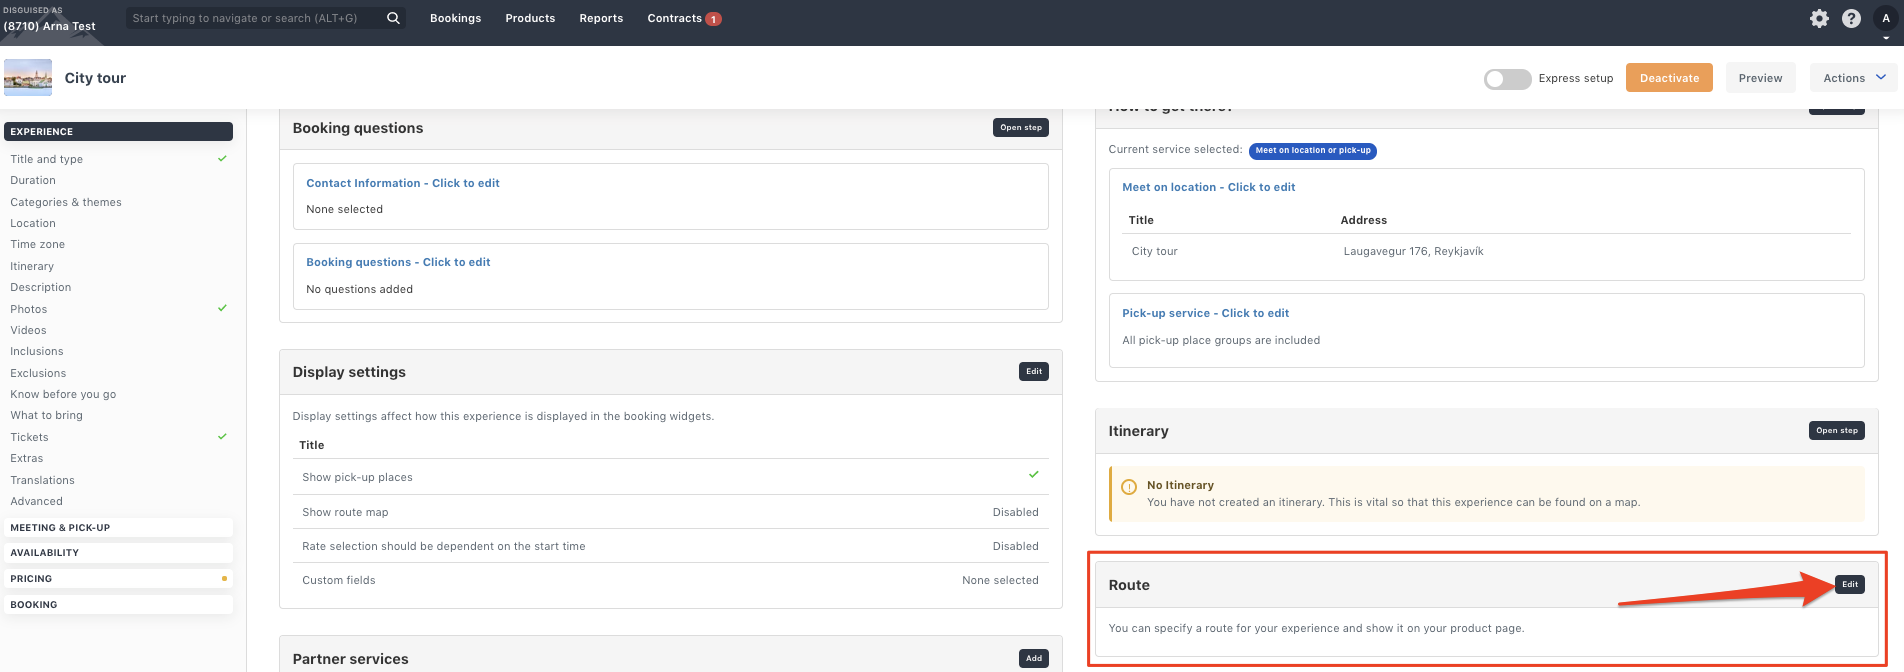
- Once in the overview tab for the product, find the Route section, and click the "Edit" button in the top right corner of the section.

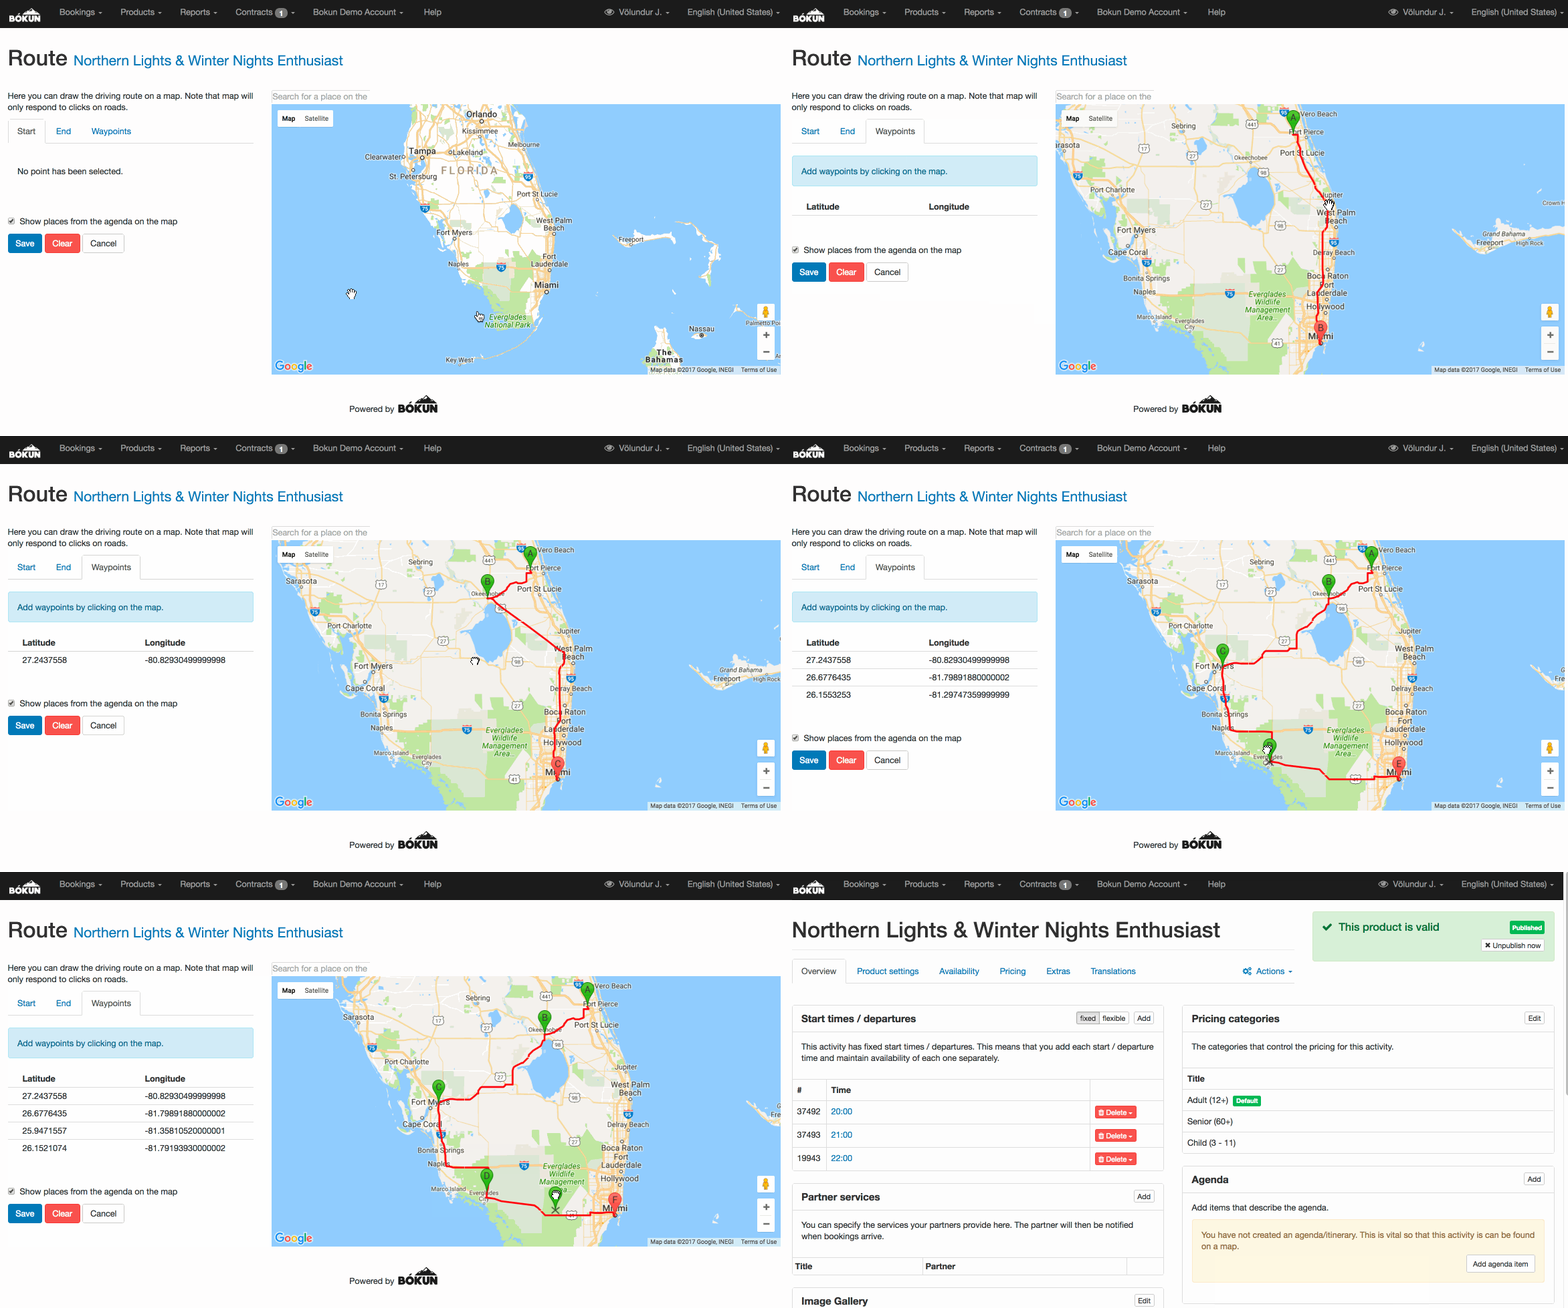
Create your route by adding a start point, end point and waypoints in between (details below).
Adding Start, End, and Waypoints to your Route
On the left hand side of the route setting screen you see three tabs. One for creating start points, end points and waypoints.

You begin by adding a start point. Click the map on the right side to add your first point to the map.
Each route can have 1 start point, 1 end point and numerous waypoints. Each point gets a alphabetical marker which indicates the order in which each point is visited on the route.
If your route is supposed to have the same start- and end points, you can check the Start point and end point are the same checkbox under the End tab.
